
DIY Friday: Mod Podge Frames
Happy DIY Friday! Today we are going to make mod podge frames. This is a cheap, but chic way to decorate your house, or your wedding reception. By using scrapbooking paper, the options are limitless! There is such a wide variety of colors, patterns and textures that there is sure to be something that you love and can make into a beautiful frame.
What you will need:
- Wooden Frames
- Scrapbook Paper
- Mod Podge
- Pencil
- Ruler
- Scissors
- Sponge brush/ paint brush
- A flat item (such as a card from your wallet)
All of the supplies I already had, except the frames. They are available to purchase at Michaels or any other craft store.

OLYMPUS DIGITAL CAMERA
First, you will turn your paper over and trace the inner corner of the frame.

OLYMPUS DIGITAL CAMERA
I took a ruler and traced 1" wider on each side so that I can wrap the paper around the frame to cover the edges as well. When you are finished, you should have something that looks liket this (see below).

OLYMPUS DIGITAL CAMERA
Next, you want to cut the inside and outside of the lines that you just traced.

OLYMPUS DIGITAL CAMERA
With foresight that the corners would hang over awkwardly, I placed the paper on the frame and cut from the outer corner of the paper to the outer corner of the frame. This small slit will help when wrapping the paper around the back.

OLYMPUS DIGITAL CAMERA
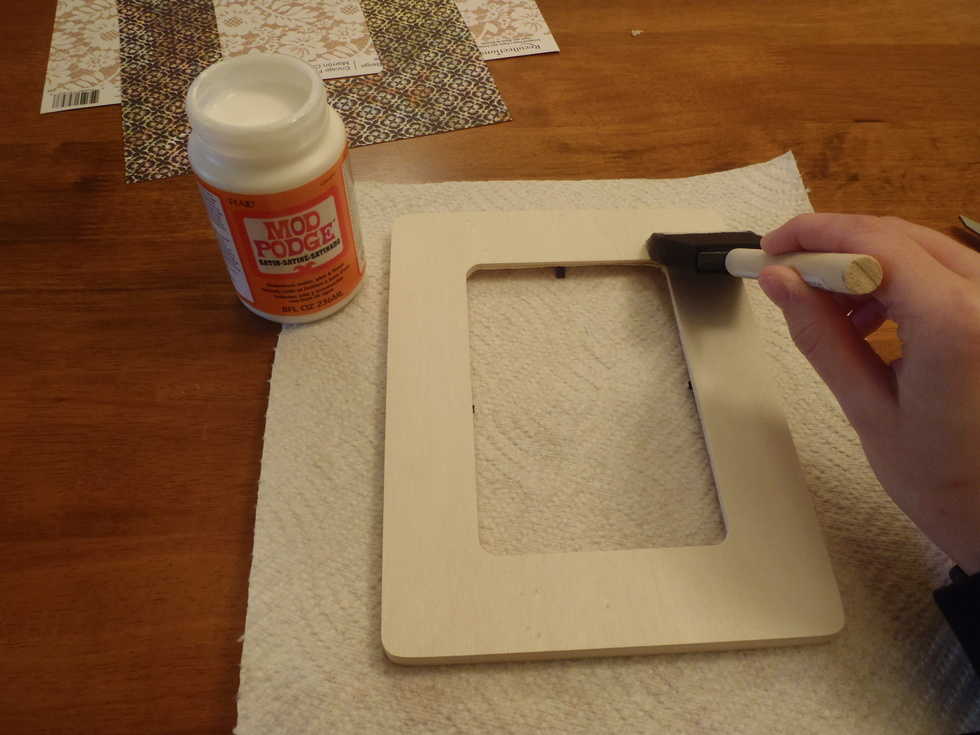
I then took a sponge brush and put one layer of mod podge around the front of the wooden frame.

OLYMPUS DIGITAL CAMERA
OLYMPUS DIGITAL CAMERA
Then carefully place the paper on top of the mod podge and use your flat item to smooth out any air bubbles or bumps.

OLYMPUS DIGITAL CAMERA
You want to leave each one to dry for at least 15 minutes before working on it again, because I did 3 at the same time, I was able to move right onto gluing the back of the first frame that had plenty of time to dry.
Paint the mod podge onto one side of the frame.

OLYMPUS DIGITAL CAMERA
Fold the access paper over and hold. It is tricky at first, but it will start to stick and then you can start smoothing out the edges. I also dabbed some mod podge on top before I moved onto the next side to ensure that it would stick.

OLYMPUS DIGITAL CAMERA
Once you are done all sides you will have flaps sticking out of all of the corners. You will be able to easily snip these and then dab mod podge to flatten the area.

OLYMPUS DIGITAL CAMERA
The finished frame at the back should look like this.

OLYMPUS DIGITAL CAMERA
Here are all three frames finished and drying.

OLYMPUS DIGITAL CAMERA
And the front!

OLYMPUS DIGITAL CAMERA
Now you are ready to pop in some family photos and hang them on the wall. We also love this idea for table numbers at a reception.

OLYMPUS DIGITAL CAMERA
Make it pretty!
